Have you ever had to facilitate a workshop where not all the participants are in the same room? It requires a new way of thinking: not only do you need the right tools (a virtual version of a whiteboard, sticky notes, online timers, etc), but it also requires a different approach to how you run the session. Is everyone engaged? Is there equal participation? Are all comments being heard?
We prepared some tips for how to run a successful remote workshop, using Miro, the online collaborative whiteboard platform. We’ll highlight general best practices, as well as the Miro features created specially for this purpose!
Disclaimer: We are assuming that you will be using Zoom (or Miro video feature / some other video conferencing platform) to facilitate your collaborative session.
Create the best experience for collaborators
Before you start, let your team get used to the new tool. Make sure that you share a board with everyone in advance, explain board basics and show them around! Miro enables you to cater an entire experience to your audience.
- When you share your board, you can invite people from your Slack or Gmail contacts, add email addresses directly, or copy the invite link and send it to your teammates. In your Sharing settings, you can also choose to make the board accessible to everyone on your team.

- To make sure everyone has the best possible experience, we recommend setting a start view for the board: for example, you can direct them to a frame that outlines the rules of the workshop. You can access this option from the settings menu in the top right.
- Another useful trick is to share a link to a specific area on the board. This is handy for when you’re working on a bigger project and your collaborative session is just a part of it. Right-click on any object and select “Copy Link” to share the board centred on this object.
- To structure board content, use the Miro Frames feature. Select the Frames tool on the left side toolbar and drag the cursor across the board to set the size of the frame. You can also create a frame around existing objects. Simply select them by holding down Shift and dragging the cursor across, then right click to open the context menu and choose Create frame.
- You can get a direct link to any frame on the board. Share this link with your collaborators to draw their attention to the exact frame. Open the context menu and choose Copy link:
Find and tailor a framework for your unique group
If you are facilitating a collaborative session, it’s important to prepare a framework that is carefully crafted around your goal. To make this job easier for you, we created dozens of templates to give you a head start and structure your work.
- To add a template to your board, click on the three-dot button on the Toolbar and choose Templates.
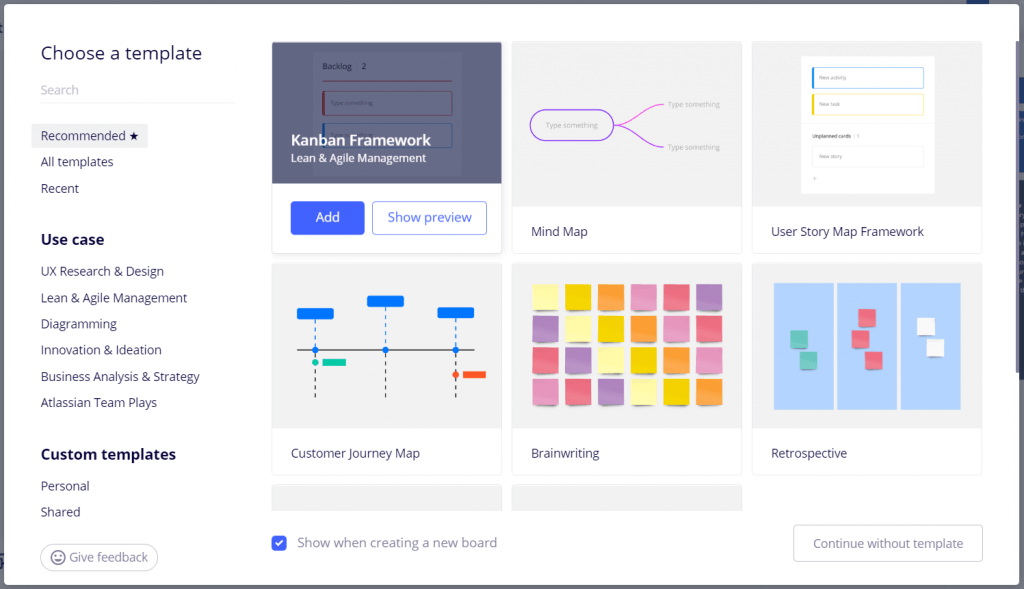
- The Miro Template picker allows you to browse through categories and preview every template before using it. You’ll see a short description of each template.
- When the template is added, the elements are automatically ungrouped. You can individually click on an object in order to move or edit it.
- Another good option is saving custom templates for the future — if your team comes up with a version of an existing template that works better for you or if you have proprietary frameworks that you like to use, you can save them.
Here are some of our most popular templates for workshops:
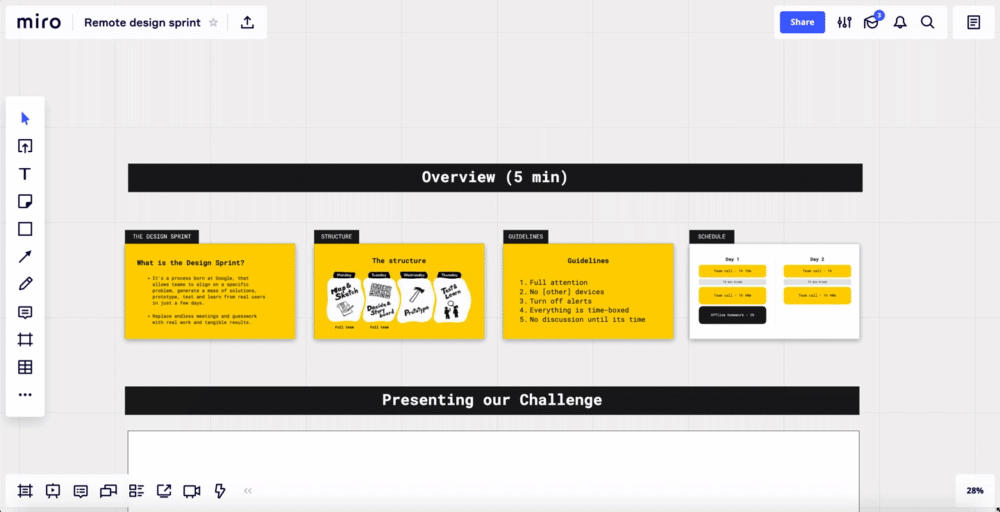
- Remote Design Sprint template. Design sprints were developed by Google to enable teams to align on a specific problem, generate multiple solutions, create and test prototypes, and get feedback from users in a short period of time. Design sprints help companies innovate more quickly.
- Lean UX Canvas Template. The Lean UX concept was created by Jeff Gothelf, author of the book LEAN UX – Designing Great Products with Agile Teams. This tool helps you to form hypotheses for testing, build experimentation plans for them, and frame your work as a business issue to solve and dissect any business problem into its core assumptions.
- Affinity Diagram Template & Example. An Affinity Diagram is a widely-used management tool that helps to organize information generated during a brainstorming session, by sorting it into groups based on their relationships for review and analysis.
To browse 120+ templates, visit the Miro Template Library.
Join Facilitator Club and discover the support and resources you need to take your facilitation skills to the next level!
Time-box everything
Use the timer function to timebox activities, discussions, and feedback. Remember, if you use the timer function, you no longer have to interrupt the loudest, most talkative person in the room. Their time will simply be “up” so that you can move onto the next step.
- To install the timer add-on, click the “+” button in the toolbar and choose from the “More tools” section.
- After setting the time period, click “Start” to begin the countdown.
- The timer starts and ends for everyone on the board. A small window always shows how much time is left, and when the time is up all the collaborators are notified.
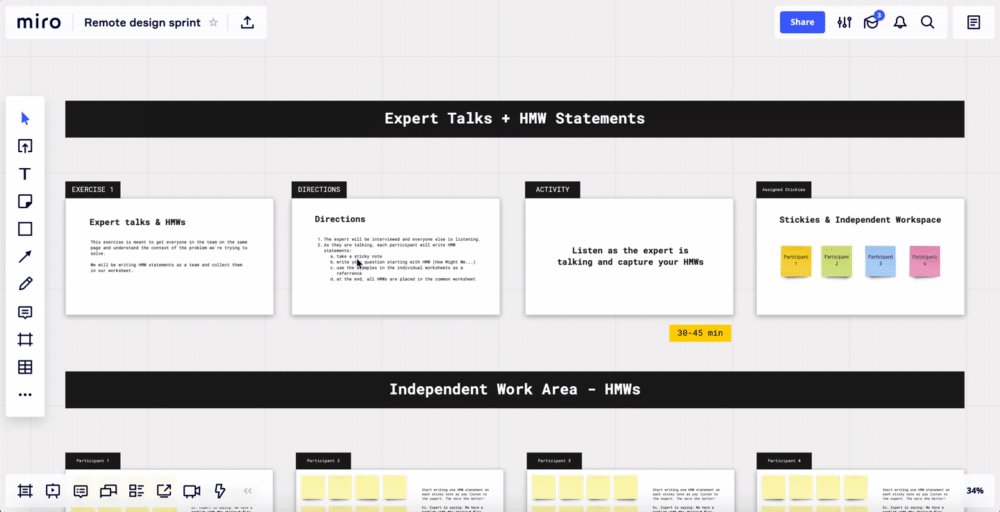
Use sticky notes for rapid ideation
If you are working in a distributed team, it’s likely that you are always thinking about combining physical and digital environments. If you did some prep work before a collaborative session in the office, you can connect your offline whiteboard with Miro. Use the iOS or Android Miro app to capture your physical whiteboard by taking a picture of the paper sticky notes, and automatically converting them to digital sticky notes in Miro.
Another trick that we love to use when we need to create a lot of sticky notes is Bulk Mode. To add a bunch of sticky notes in a row, click the Sticky Note icon, choose Bulk Mode, and start typing away. Just click enter to separate ideas. Click Done, when you are finished, and your ideas will be added to the board as sticky notes. This feature allows each participant to have some privacy while they are ideating, because your stickies are only visible to you before you decide to share them. So it’s good for refining certain ideas before presenting them to the group.
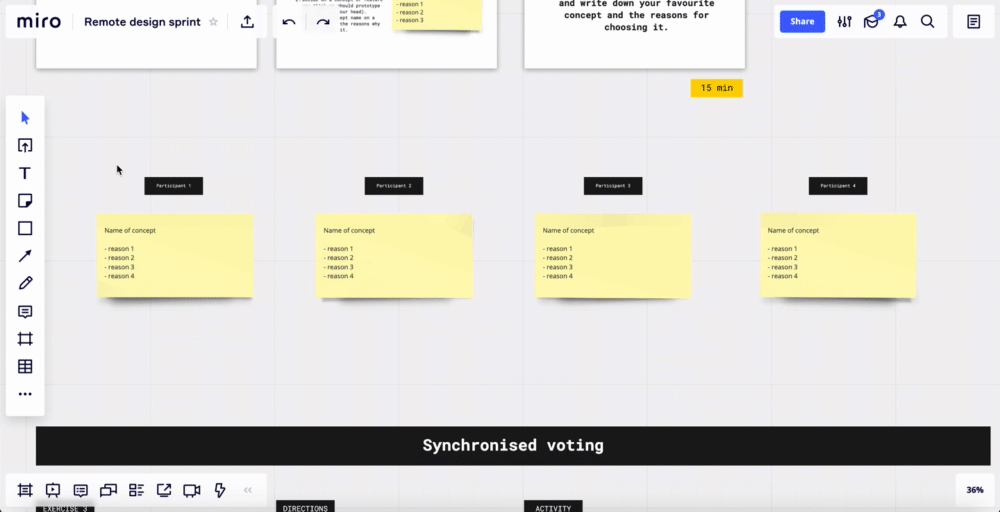
Work in groups and individually
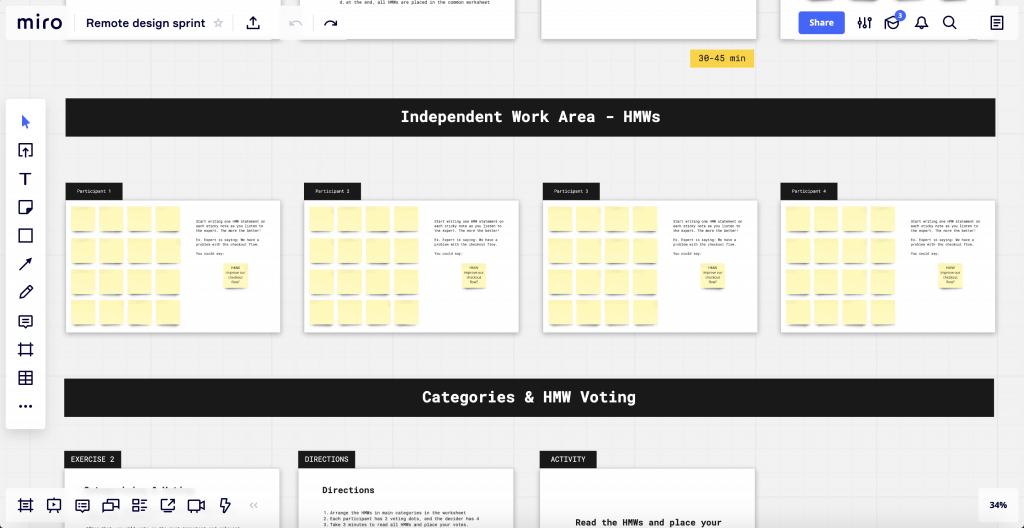
For certain types of working sessions, it’s important to give each person their own workspace. For example, when we were going through a brand sprint, we created a separate frame for each participant so everyone had their own desktop working space and an assigned each participant a sticky note color (or you can add tags with participants’ names). We prepared the individual workspaces ahead of time by putting a bunch of sticky notes in each. And if an activity required any widgets or templates than sticky notes, like the Personality Sliders below, we simply copied everything needed into each workspace as well.
When you are done with individual activities, you can make sure all participants understand what the facilitator is pointing at by using Screenshare mode. Screenshare mode allows the facilitator to take control of the presentation so that all participants see what they see. Screenshare displays at the bottom of the board, like the timer, and when users join they will no longer be able to edit which reduces distractions when you want to present. As the facilitator, you can see who has joined the screenshare and who has not so you can ask them to join.
Choose the best ideas faster
When you need to make decisions as a team, use our voting feature and invest in ideas that the majority of your team believes in. With this add-on, you can carry out a voting session for your team regardless of their role or location. Put your ideas on the digital sticky notes, texts, shapes or images and vote for the best ones.
- The board editor who starts a voting session can customize the voting name, duration, number of votes per person and the objects up for vote.
- The voting duration can be set from one minute up to 99 hours for quick voting during a workshop or asynchronous voting following.
- The number of votes per person is currently limited to 10.
- To keep it all fair, the votes are anonymous and only displayed when the voting session is over.
- Miro will display the results of the voting session so you can see the most voted for ideas and these results will be saved in Miro after the session to refer back to.
Present your work in Miro
If you’d like to turn the result into a beautiful presentation, here are some tricks that can help you organize board content.
- Grouping. You can group multiple objects together by selecting them and clicking the Group objects button (or using Ctrl+G). After that, they will behave as a single object (although you can still edit each object within the group).
- Aligning. You can align multiple objects that are spread across the frame by selecting them and clicking, Align Objects, button in the context menu. Selected objects can be aligned horizontally, vertically and on left/right sides in relation to each other.

- Colors. There are 16 default colors in the palette. You can apply them to any drawing, shape or text. The palette is the same across these tools and makes it much easier to create great-looking content. You can also add new colors (for example, your brand colors) to make your presentation look professional and on brand.
Once you are happy with the way content looks, present it!
- Put groups of objects into Frames (think of these as the ‘slides’ for your presentation).
- To pan from one frame to the next reorder, or modify them, use the Frames panel. You’ll find it in the lower left-hand corner.
- Click “Presentation mode” to navigate smoothly between your frames on the board. Click “Play” to enter full-screen presentation mode, and use the arrows to move through your frames.
Ask the participants to zoom out so they can see the full board and all of the amazing work they’ve done.
Working with a remote team can be challenging — but it also offers unparalleled opportunities for creativity, collaboration, and making sure everyone’s voice is heard. Miro’s online whiteboard helps teams overcome geographic barriers and communication silos to empower you to stay connected and do great things. And if you're building up your facilitation toolkit, visit our guide to tools for online workshops and meetings.


